
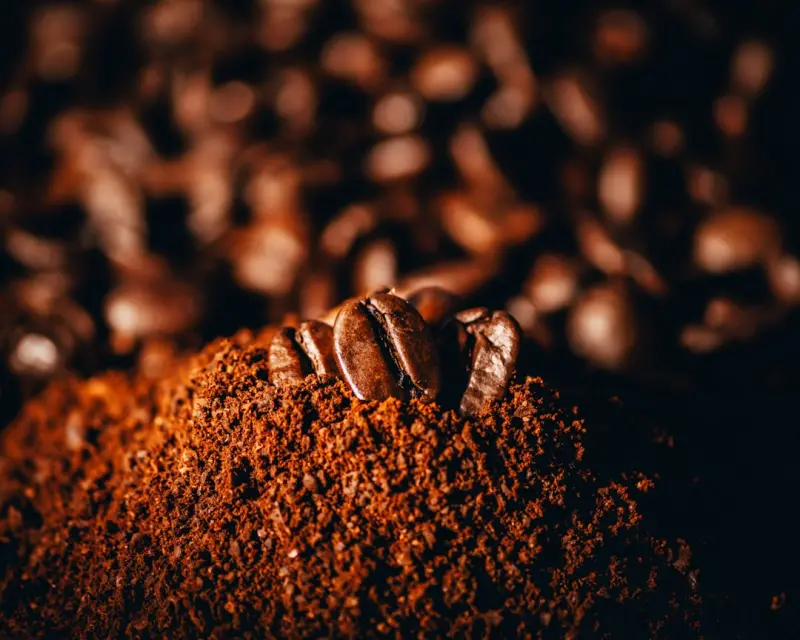
Why Home Brewing Is the New Frontier of Zero‑Waste Living
When I first tried to rescue a half‑gone batch of coffee grounds by turning them into a cold brew concentrate, I didn’t just save a few pennies—I discovered a mindset. The kitchen, for many of us, feels like a relentless cycle of purchase, prep, and waste. But what if every “leftover” could become the seed of a new beverage?
Zero‑waste home brewing isn’t about a single recipe; it’s a philosophy that lets us reimagine the very definition of a “drink.” From the bitter remnants of espresso to the fibrous skins of citrus, each by‑product carries flavor, aroma, and, increasingly, functional benefits. In this post I’ll walk you through three approachable brewing projects, the science behind turning waste into wonder, and how you can embed these practices into a sustainable lifestyle that feels both rewarding and delicious.
The Science of Turning Scraps Into Sips
At the heart of every successful zero‑waste brew lies a simple microbiological truth: microbes love nutrients. Whether you’re fermenting coffee grounds into a tangy kombucha or coaxing wild yeast from fruit skins into a sparkling soda, you’re giving friendly bacteria and yeasts a banquet. This not only extracts flavor but also creates Flavor Alchemy moments—where technology meets tradition, even if that “technology” is just a mason jar and a rubber band.
Two key processes dominate most home‑brew experiments:
- Extraction: Hot water, alcohol, or gentle heat pulls soluble compounds (caffeine, acids, sugars) from the waste material.
- Fermentation: Microbes metabolize sugars, producing carbon dioxide, ethanol, or organic acids that transform the base into a complex, often probiotic‑rich beverage.
Understanding the balance between extraction time and fermentation temperature lets you dial in the flavor profile you crave—whether that’s a bright, citrusy soda or a deep, earthy coffee kombucha.
Project #1: Coffee Grounds Kombucha (The “Espresso Elixir”)
What you’ll need
- 1 cup used coffee grounds (cooled, not soggy)
- 2 L filtered water
- 1 SCOBY (symbiotic culture of bacteria & yeast) – you can source it from a friend or a reputable starter kit
- ½ cup organic cane sugar (the fuel for the SCOBY)
- Glass jar, breathable cloth, rubber band
Step‑by‑step
- Boil the water and steep the coffee grounds for 10 minutes, mimicking a French press but without the press.
- Strain the liquid through a fine mesh, discarding the grounds (or repurpose them in your garden).
- While the brew cools to room temperature, dissolve the sugar fully.
- Transfer the sweetened coffee to a clean jar, add the SCOBY, and cover with the cloth.
- Let it ferment in a dark corner for 5‑7 days, tasting daily after day 4. When the acidity balances the coffee’s natural bitterness, it’s ready.
- Bottle, refrigerate, and enjoy a probiotic‑packed espresso soda. Optional: add a splash of vanilla or a dash of cinnamon for extra depth.
This brew gives you the buzz of coffee plus the gut‑friendly benefits of kombucha. It’s perfect for a mid‑morning pick‑me‑up that doesn’t rely on a fresh espresso shot.
Project #2: Citrus Peel Sparkling Water (The “Zest‑Fizz”)
Every time we slice an orange, lemon, or grapefruit, a fragrant rind goes to waste. Those peels are rich in essential oils and pectin—perfect for a natural carbonation project.
Ingredients
- Peels from 3 large citrus fruits (no white pith, which can taste bitter)
- 1 L filtered water
- ¼ cup raw honey or agave (to feed the wild yeast)
- ½ tsp sea salt (helps stabilize carbonation)
- 1‑2 tbsp whey or kefir (for a gentle starter culture)
Method
- Place the citrus peels in a large glass jar and cover with water.
- Add honey, sea salt, and whey. Stir gently.
- Seal the jar with a breathable cloth, let it sit at room temperature for 48 hours. You’ll notice gentle bubbles forming—signs that wild yeast is at work.
- After 48 hours, strain the liquid, pour it into clean swing‑top bottles, and refrigerate for 24 hours to halt further fermentation.
- Serve chilled, perhaps with a thin slice of fresh citrus for garnish.
The result is a lightly carbonated, subtly sweet drink that celebrates the bright notes of the peel while delivering a modest probiotic punch.
Project #3: Veggie‑Skin Ginger Beer (The “Root‑Revival”)
Think about the last time you tossed the skins from carrots, beets, or even a sweet potato. Those skins are a gold mine of sugars and fiber, and when paired with ginger’s spicy kick, they produce a bold, earthy ginger beer without any added refined sugar.
What you’ll need
- Peels from 2 carrots, 1 beet, and 1 sweet potato (washed well)
- ¼ cup fresh grated ginger
- 2 L filtered water
- ½ cup brown sugar or coconut sugar (optional, for extra fizz)
- 1 cup homemade whey or a commercial ginger‑beer starter culture
Process
- Combine the vegetable peels, ginger, and sugar (if using) in a large pot with the water.
- Simmer gently for 15 minutes, then let cool completely.
- Strain, add the whey or starter culture, and transfer to a fermentation vessel.
- Cover with a cloth, allow to ferment for 3‑5 days, tasting each day for the balance between spice and sweetness.
- When the flavor is to your liking, bottle in airtight containers, let sit at room temperature for an extra 24 hours for natural carbonation, then refrigerate.
- Enjoy a vibrant, earthy ginger beer that feels like a garden in a glass.
This brew showcases how “scraps” can become a centerpiece at a dinner party, surprising guests with depth and authenticity.
Embedding Zero‑Waste Brewing Into Your Routine
Now that you have a toolbox of recipes, the next step is turning them into habits. Here are three practical ways to keep the momentum going:
- Designate a “Brew Corner.”strong> Set aside a shelf or countertop space with mason jars, a breathable cloth, and a small labeling system. When you finish a coffee, a quick rinse and the grounds are ready for the next kombucha batch.
- Batch‑Plan Your Scraps. On grocery day, note which produce will generate peels or skins. Group similar scraps (citrus, root vegetables) into separate containers so you can start a specific brew without delay.
- Share the Culture. Just as breweries share yeast strains, home brewers can exchange SCOBYs, starter whey, or even finished bottles with friends. This not only expands your flavor repertoire but also creates a community of zero‑waste advocates.
If you’re looking for an extra boost in community engagement, consider a Restaurant Membership Club model that highlights local home‑brew collaborations. Imagine a café that offers a rotating “scrap‑sourced” soda line—members get exclusive tastings while the shop reduces its waste footprint.
Beyond the Bottle: The Bigger Impact of Zero‑Waste Brewing
Every jar you fill is a small rebellion against the “single‑use” culture that dominates the beverage industry. The environmental benefits are tangible:
- Reduced landfill waste: Diverting coffee grounds, fruit peels, and vegetable skins from landfills cuts methane emissions.
- Lower water usage: By brewing at home, you avoid the massive water footprints of commercial soda production.
- Energy savings: Home fermentation relies on ambient temperature, not energy‑intensive bottling plants.
But perhaps the most rewarding outcome is the psychological shift. When you taste a drink that started as a “waste” ingredient, you experience a moment of alchemy—a reminder that scarcity can be turned into abundance with a dash of curiosity and a sprinkle of patience.
Scaling Up: From Kitchen Experiments to Small‑Batch Business
If your home brewing adventures start to attract friends, neighbors, or social‑media followers, you may wonder: “Can this become a micro‑enterprise?” The answer is a resounding yes, especially if you align with the growing consumer demand for transparent, sustainable, and locally sourced beverages.
Key steps for turning hobby into hustle:
- Regulatory groundwork. Research local food‑safety regulations. Many jurisdictions have “cottage food” exemptions for low‑volume, non‑alcoholic beverages.
- Brand narrative. Craft a story that highlights the waste‑to‑taste journey. Consumers love a good origin tale—think of it as your own version of The Secret Sauce for drinks.
- Distribution channels. Start with farmers markets, pop‑up stalls, or a subscription box model that delivers fresh bottles to doorsteps.
- Feedback loops. Encourage buyers to share flavor notes and suggestions. This data can guide your next batch, ensuring you stay responsive to taste trends.
By keeping production modest and focusing on the story behind each sip, you can maintain the authenticity that makes zero‑waste brewing compelling while earning a modest profit.
Final Thoughts: Sipping With Purpose
Zero‑waste home brewing is more than a culinary experiment; it’s a practice of gratitude, creativity, and stewardship. Whether you’re coaxing a lively kombucha from yesterday’s coffee grounds or fizzing up a bright citrus soda from peel leftovers, each bottle you uncork is a reminder that food systems don’t have to be linear—they can be circular, flavorful, and endlessly surprising.
So the next time you finish a latte, don’t toss the grounds. Instead, let them ferment, bubble, and transform into a probiotic elixir that fuels both your body and the planet. Your kitchen, after all, is the most accessible lab you’ll ever need. Cheers to turning scraps into sips—one jar at a time.

Related Posts
When Your Fridge Knows Your Taste: AI‑Driven Flavor Profiles for Home Cooks
Explore how AI can scan your pantry, learn your taste preferences, and generate personalized, wasteâ... Read More

Zero‑Waste Cocktails: Turning Bar Trash into Tasty Treasure
Zero‑waste cocktails turn everyday bar scraps into flavorful, sustainable drinks. Learn the philos... Read More

Adaptogen Coffee: The New Office Power Drink
Adaptogen coffee blends the energizing punch of caffeine with stress‑busting herbs, offering a ste... Read More
Top Posts

Chasing the Midnight Bite: Ontario’s Untapped Night Fishing Adventures
Explore Ontario’s hidden night‑fishing locations, learn essential gear, and embrace Indigenous traditions for sustainable, unforgettable midnight angling ad...Read More

Tariffs as Community Catalysts: Turning Duties into Local Opportunity
Discover how tariffs reshape community dynamics, influence consumer psychology, and offer a strategic playbook for small businesses to turn duty hikes into grow...Read More

How Remote Work Contracts are Redefining Canadian Employment Law
A deep dive into the legal complexities of remote‑work contracts in Canada, covering privacy, jurisdiction, compensation, and future hybrid trends....Read More

The Rise of Seamless Sea‑to‑Road Journeys for the Connected Explorer
Modern travelers are blending ocean cruises and bus tours into a fluid adventure, leveraging technology, wellness design, and eco‑conscious planning to create...Read More
0 Comments
Post Comment
You will need to Login or Register to comment on this post!